12. Promoted Search
Creating Promoted Search Results
Creating Promoted Search Results
So this is what you would do if you want to create, edit or remove a "promoted search" result = so when a user goes to our website search bar, and they search something, we can pin specific content to come up first to make sure they're served accurate results.
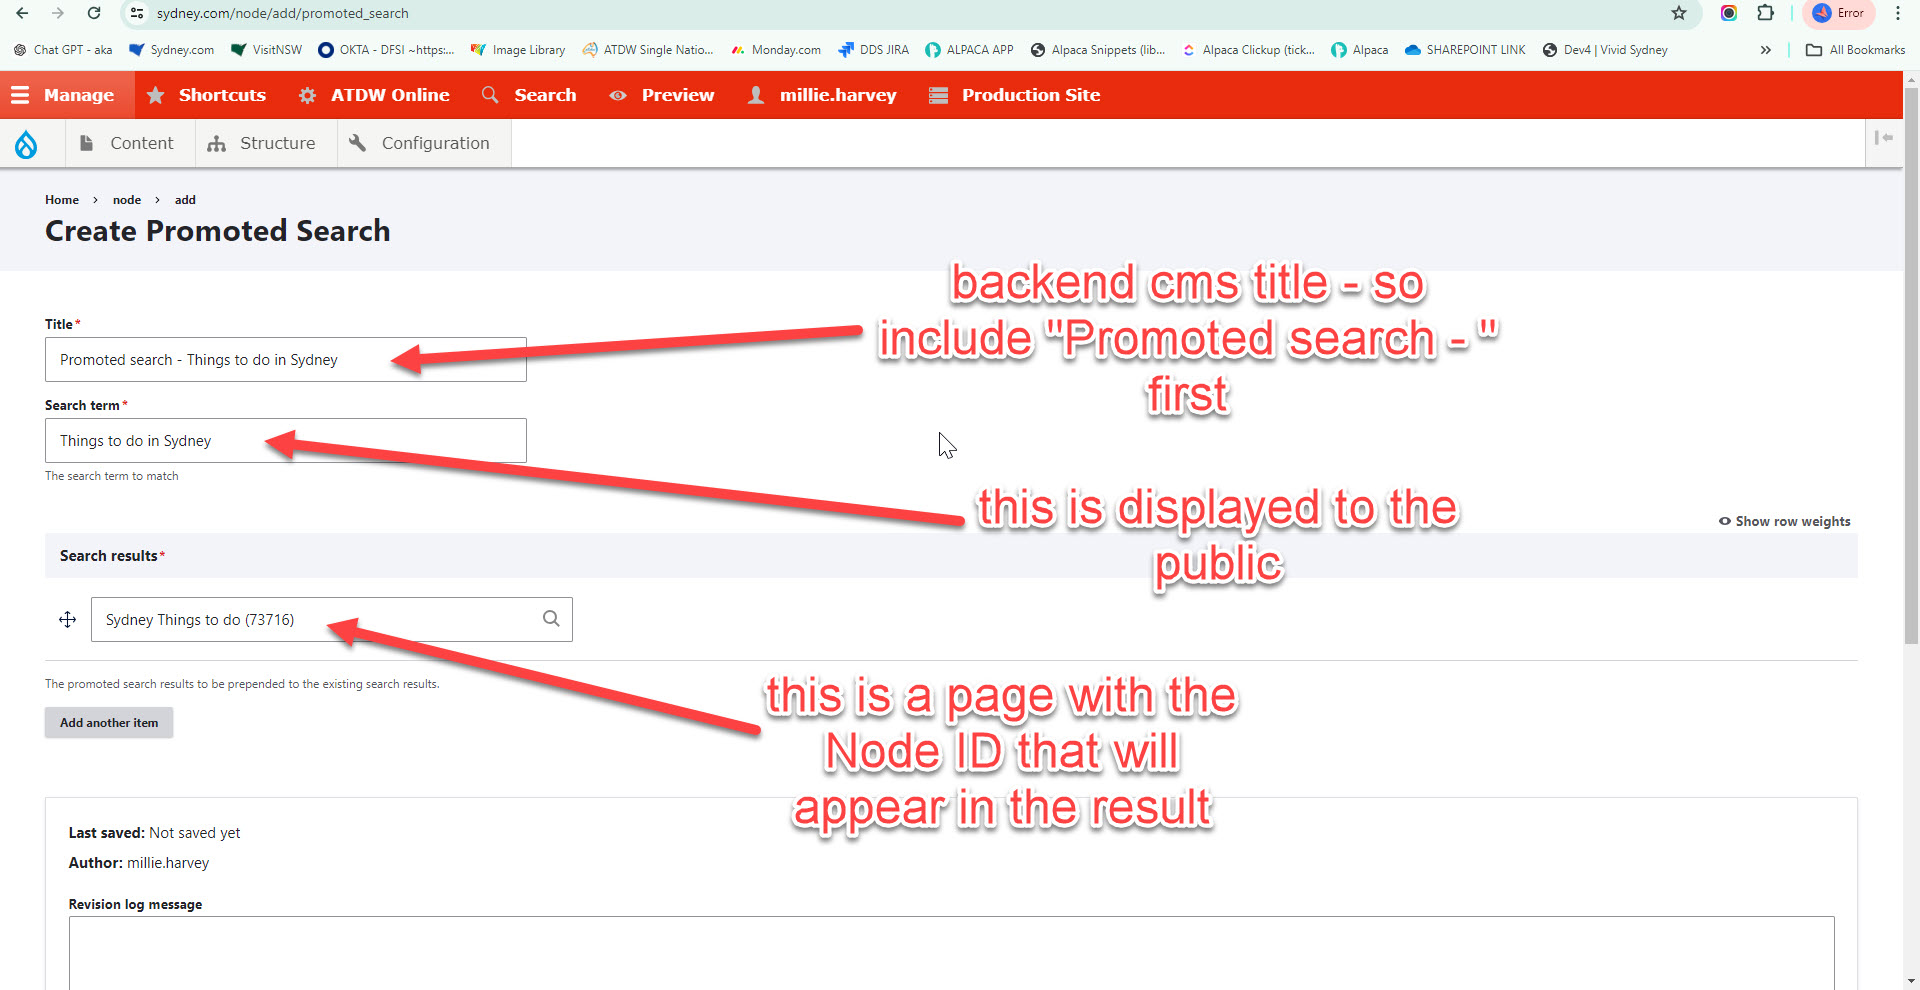
If you're creating a new one, you'll need to firstly create a "Promoted Search Node": https://www.sydney.com/node/add/promoted_search
The Title* should always have "Promoted Search - " at the start of it, as this is for the backend and we need to keep it clean.
The Search Term* is what is public facing, so this will be the actual search term e.g. "Upcoming events"
In the Search results* you will type in the name of the website page you want to appear in the search results. This is a bit of a funny one as you cant see the url, but you can see the node ID, so if you're unsure exactly which one to pull through, open the page up in the backend that you'll be linking to, and you can take the node ID out of the url.
Note: they'll appear in the order you put them in for the backend, so just drag and drop to re-order.